 Mosaic Help Centre
Use the email editor
A guide to the blocks, settings and preview in the drag-and-drop email editor.
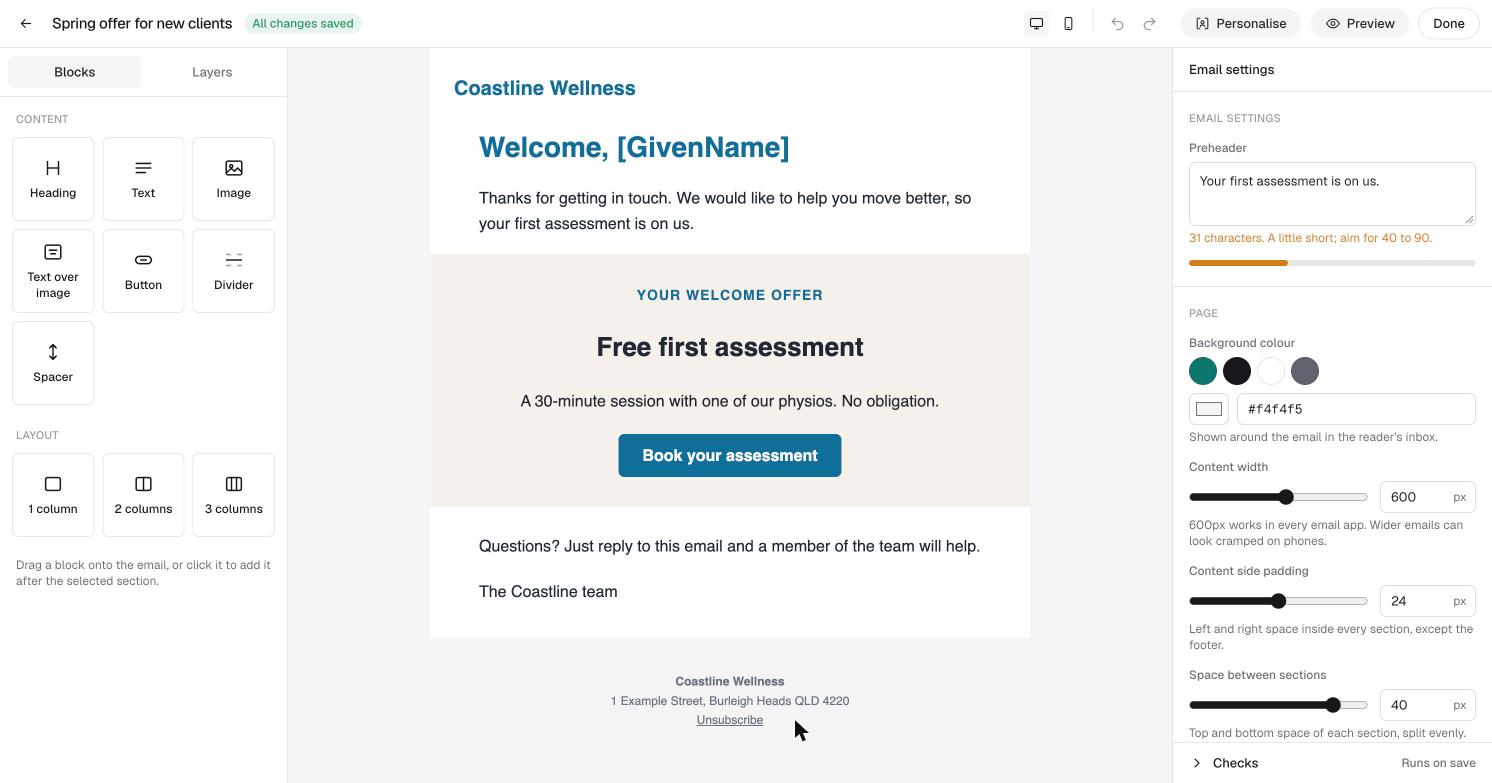
The email editor lets you design an email without writing code. To open it, click Edit design on a campaign. If you're new, start with how to build a campaign.
The top bar
- The back arrow returns to the campaign. All changes saved confirms your work is safe, because changes save automatically.
- The desktop and mobile icons switch how the email is shown while you work.
- Undo and redo step backwards and forwards.
- Personalise adds details such as a contact's first name, which appears as
[GivenName]. - Preview shows the email with sample details filled in.
- Done takes you back to the campaign.
Blocks
The Blocks tab on the left has everything you can add.
- Content: Heading, Text, Image, Text over image, Button, Divider and Spacer.
- Layout: 1 column, 2 columns and 3 columns.
Drag a block onto the email, or click it to add it after the selected section. Click any block on the email to edit it, and double-click text to type your own words.
The Layers tab shows the structure of the email as a list.
Email settings
With nothing selected, the panel on the right shows settings for the whole email.
- Preheader. The short preview line shown after the subject in an inbox. Mosaic counts the characters and suggests aiming for 40 to 90.
- Background colour shown around the email in the reader's inbox.
- Content width. 600px works in every email app. Wider emails can look cramped on phones.
- Content side padding and Space between sections.
- Checks run each time you save.
The footer
The footer shows your business name, address and an Unsubscribe link. Marketing emails must include the unsubscribe link.